

The new Google Image Licensing feature is based upon two metadata properties : Webstatement and LicensorURL. I tried to set these metadata with Adobe Bridge CC but could only define a Licensor. WebStatement was not in the metadata Panel. Why ?
Adobe Bridge only displays a subset of metadata in the metadata panel. By default, WebStatement renamed as “Copyright info URL” in Bridge is not displayed. This article shows you how to display more metadata in Bridge with Edit>Preferences.
Google Image Licensing reads two metadata properties : WebStatement and LicensorURL. I will show you how to set these properties in Adobe Bridge CC.
If you wish to know more about Google Image License, you may read more about it in another article I wrote about Photoshop Guide for Google Image License Metadata : Licensor & WebStatement.
Bridge and Photoshop share their metadata univers. Metadata names are the same, the code infrastructure is the same too. But the User Interface are different. That’s the reason why we may have the impression that some metadata are missing in Bridge.
How to set WebStatement in Bridge
How to Create Metadata Templates in Bridge
List of usefull copyright and ownership
How to set WebStatement in Bridge
You can display and modify your image metadata in Bridge’s metadata panel.
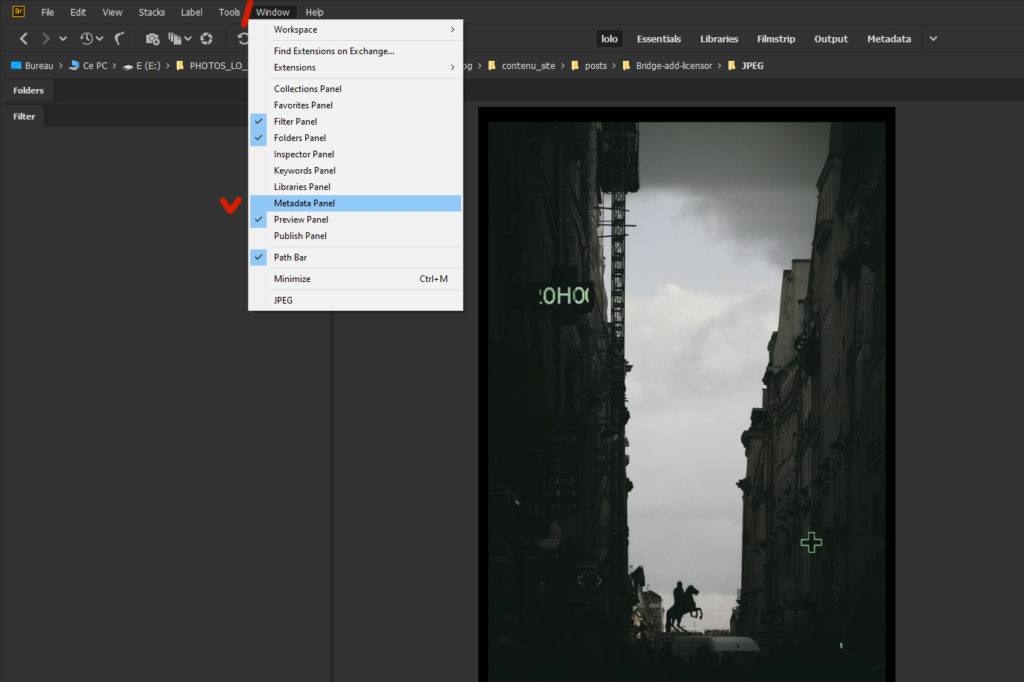
If the metadata panel is not displayed in your workspace, you can add it easily. Go to Windows and toggle the metadata panel.

Google License Image uses two metadata properties : WebStatement and LicensorURL. Let’s add them to our selected image.
Here is a 2-minutes tutorial in video :

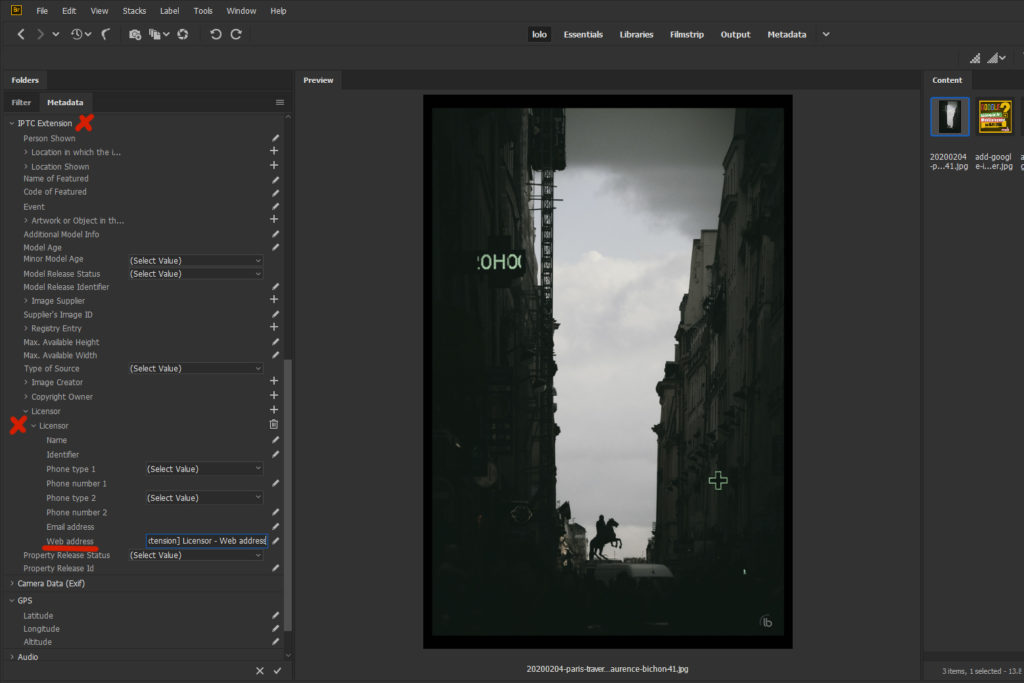
First, I add a LicensorURL property to my image.
In order to do so, go to the IPTC extension section. At the right of Licensor, click on the big + sign. This creates a Licensor structure. In this structure, we only set the LicensorURL property at the end of the structure. If you have several Licensors dor an image, you can create several Licensor structures this way.

If you display all metadata in the metadata panel, you won’t see WebStatement. In Photoshop, Webstatement in located in the Basic metadata section under the name “Copyright Info URL”. But you dont’s see Copyright Info URL either.
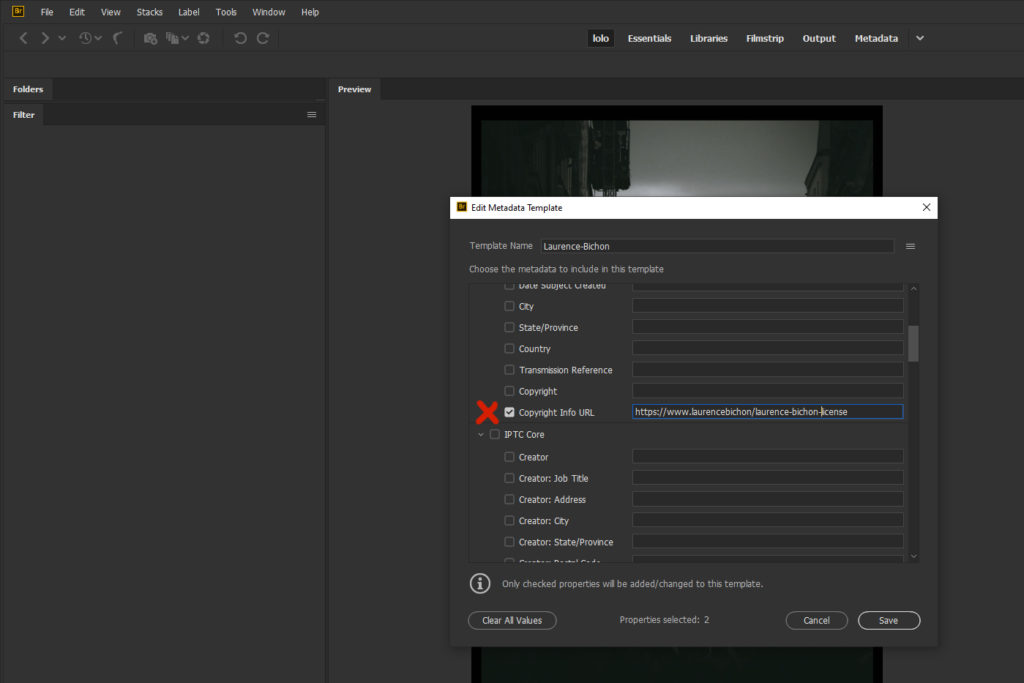
In order to see WebStatement alias Copyright Info URL, go to Bridge Edit > Preferences > Metadata. Scroll down in the IPTC (IMM, legacy) section. At the end, you’ll see that Copyright info URL is not selected. Select it, and save.
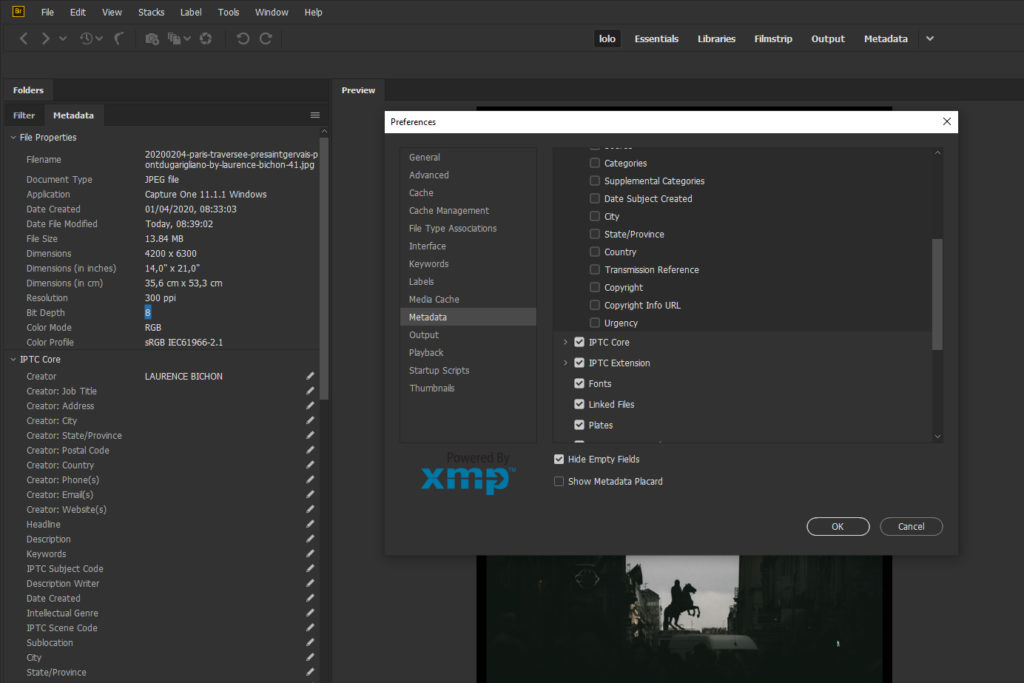
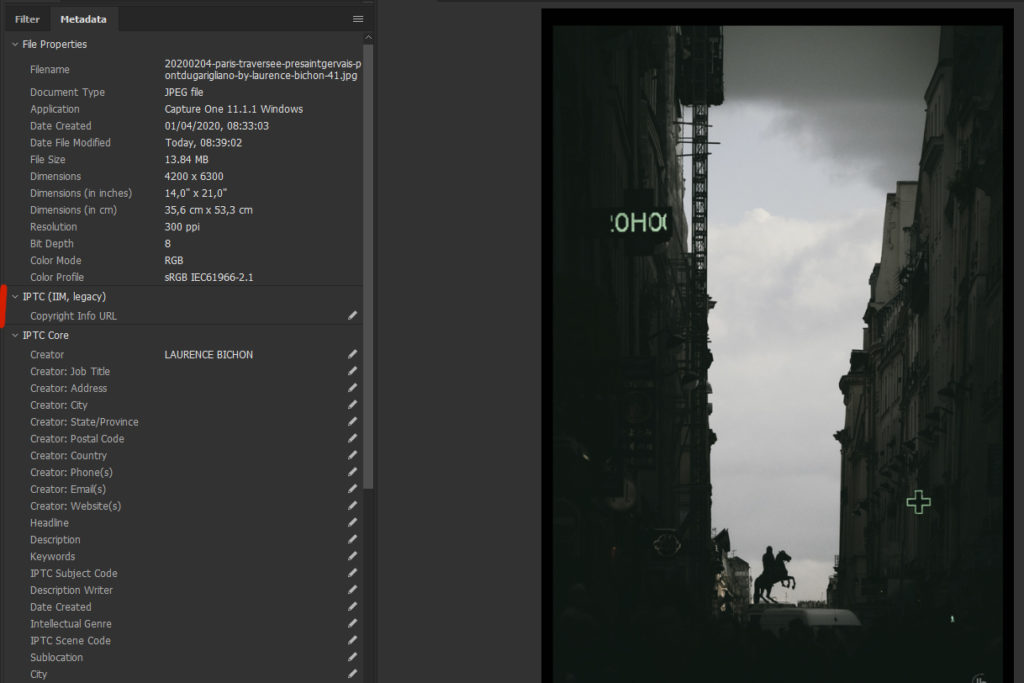
Back in the metadata window, the IPTC (IMM, legacy) section is now displayed with only the metadata you chose to display. In our case, you see now Copyright info URL alias Webstatement in the XMP-xmpRights namespace.
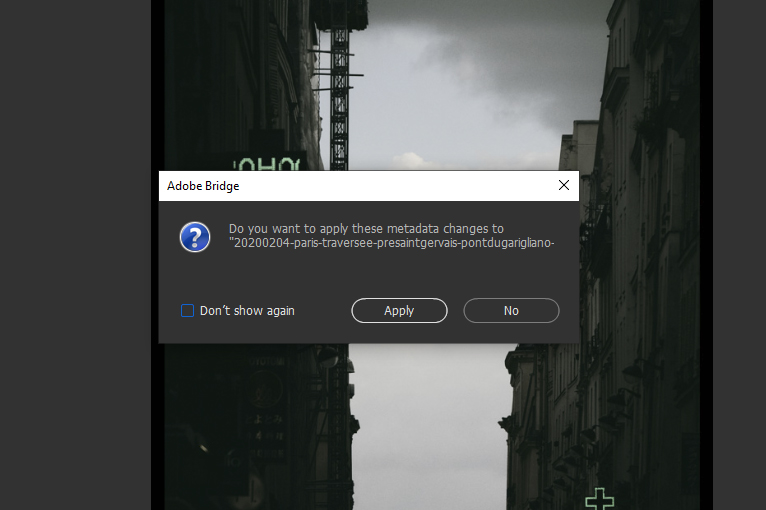
If you update metadata for an image, Bridge will ask you to confirm the changes in a confirmation window when you select another image for example or when you close Bridge.
Metadata are not applied to the image until you confirm.

How to Create Metadata Templates in Bridge
There are several types of metadata:
- Some of them differ from image to image, for instance the Title.
- Some of them are always the same, for instance copyright and image ownership.
This is why it makes sense to create copyright metadata presets and apply them to all your images as part of your editing / publishing process.
In Adobe Bridge, metadata presets are called metadata templates.
Go to Bridge Tools > Edit Metadata Template.

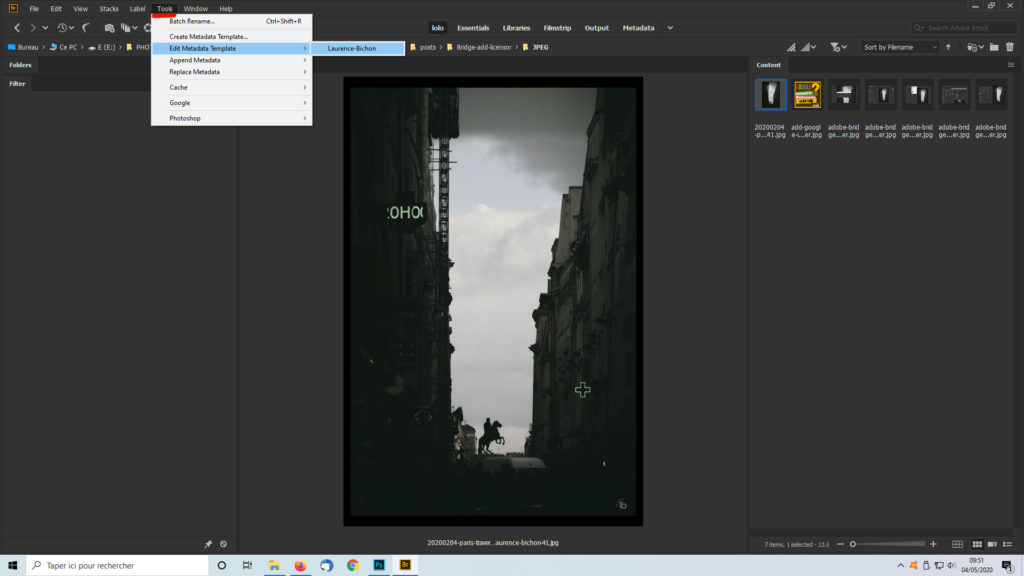
Then you can name your template and edit or modify your metadata properties.
For our example I set :
- LicensorURL to “https://blog.laurencebichon.com/laurence-bichon-license/”.
- Copyright Info URL to “https://blog.laurencebichon.com/laurence-bichon-license/”.
Save the Metadata Template.
In Bridge, select one or several images you want to apply the metadata template to, go to Bridge Tools > Replace Metadata or Append Metadata and select the metadata template.
Metadata are applied in auto confirmed mode. No confirmation window with Tools Append Metadata and Replace Metadata.
List of usefull copyright and ownership metadata
There are quite a lot of metadata properties related to copyright and image ownership.
One of the reasons is that the metadata needs evolve and metadata became more explicit and thus more complex with time. First, the norm was Exif, then IPTC came along and then XMP on top of them.
When I decided to really dig into image metadata in my processes as a freelance photographer, I wrote a metadata survival guide. That’s says a lot about how lost I felt regarding metadata. Then once I started to reseach, read, try, it became a lot simpler and quite fun actually. I hope this will be the case for you too !
If you are looking for a list of copyright metadata to start your metadata template upon, you can also have a look at my Copyrights and Authorship Image Metadata Settings here.
More about Bridge Metadata
GPS metadata
Adobe Bridge allows you to read, but also to set GPS metadata :
- Latitude
- Longitude
- Altitude
This is a nice feature if you set your geo coordinates as a batch for your photoseries as I do.
You can set them as string, for instance :
| Latitude | 48,23.91816N |
| Longitude | 2,43.37634E |
It’s nice to have, even if it would be even better if Bridge provided a geo map interface as Lightroom does.
Photoshop, on the contrary, only display GPS metadata, but does not allow you to change them.
Camera Data (Exif)

By default, Adobe Bridge does not display Camera Exif Metadata. However, you can choose display them in Bridge > Edit > Preferences > metadata , Camera Data (Exif) toggle.
Some camera Exif report information about you and your gear that some may consider confidential, as for instance :
- you camera body number
- your lens serial number
You can use tools like exiftool to remove some Exif data from you images. Beware not to remove to much though. for instance raw files are interpreted with the help of some Exif metadata properties.
Here is the official documentation for exiftool.
Personnaly, I use Capture One Pro to develop my Fujifilm raw and Jpeg images. When I export the edited images as JPEG files, I can choose if I want to keep or not camera metadata in the Capture One export recipe.
I then often use Adobe Photoshop or Bridge to add GPS, Google Image License info, and also to add a border to my images.
How to create a Metadata Template from an Image in Bridge
You can create a metadata template in Bridge > Tools > Create Metadata Template. You will then be able to type ine every metadata property.
You can also create a metadata template from the metadata of an image.
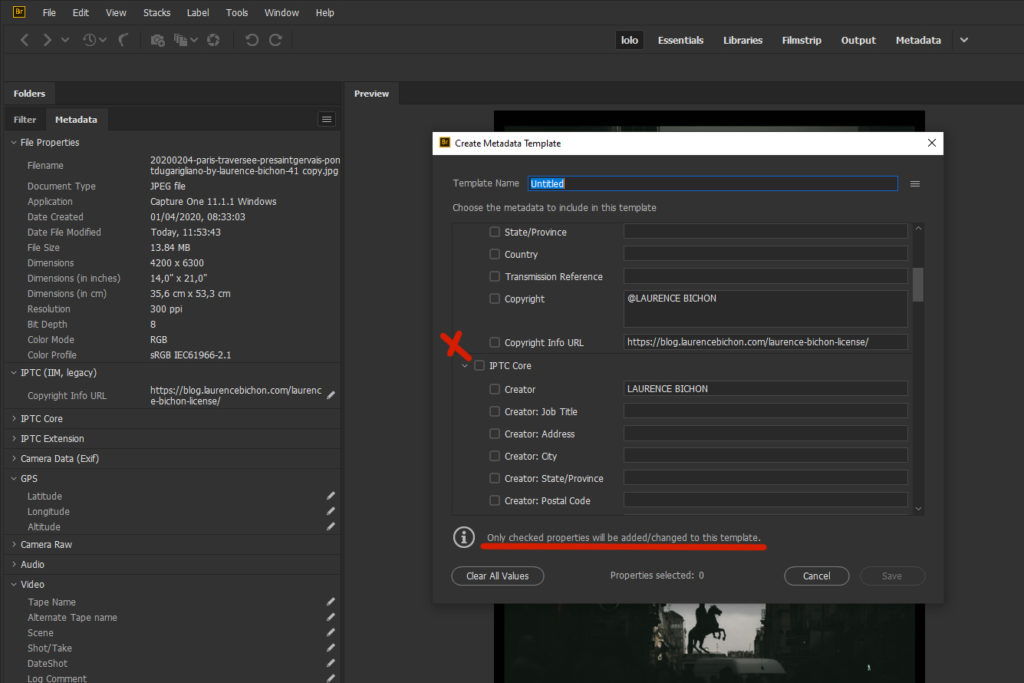
In Bridge, select the image you want to create the template from. Select Create Metadata Template… in the Metadata Panel menu (3 small bars on the panel upper right corner).
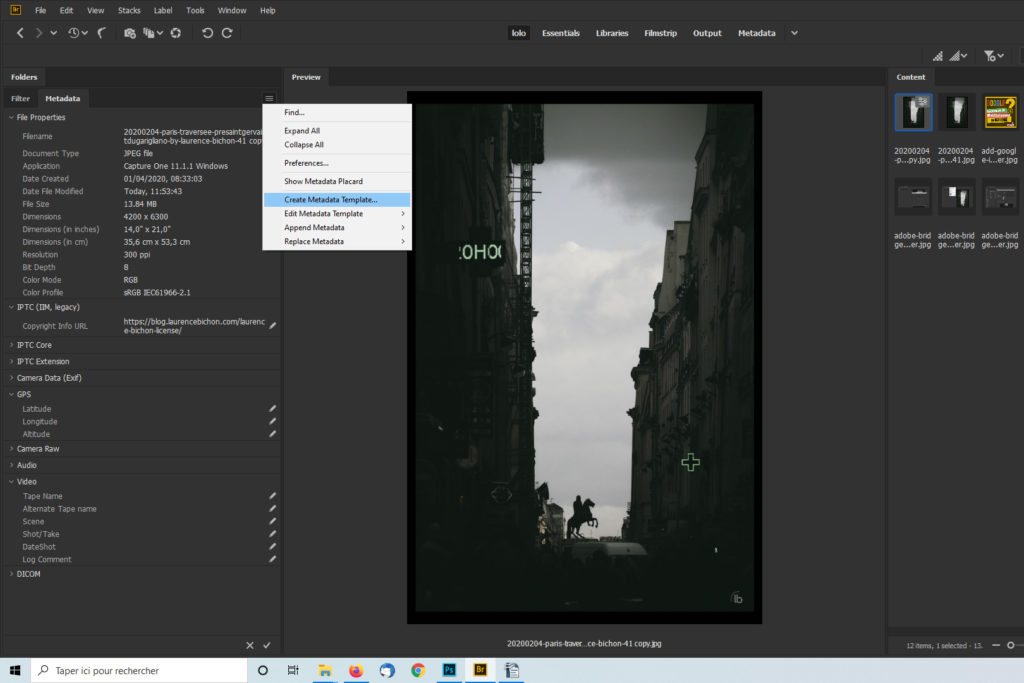
Then a window opens where you can create your new metadata template. You view all setable metadata, and every metadata of the image has been copied in this window. You then have to select the properties you want to include in the template. Then Save.
How to Copy a Metadata from one image to another image
In Bridge, if you duplicate and image, or if you copy an image to another one, the metadata will follow and will be copied also.
If you want to copy the metadata from one image to another existing image, or to a set of images, you will have to create a metadata template from the original image and then apply this template to the target image or the target set of images.
Note that Copying the image Develop Settings does not copy the image metadata.
Conclusion
We’ve reached the end of this article.
Thank you for your visit. I hope you found the info you’ve been looking for.
Stay tuned and see you soon !