There was a time when I was reluctant to clean dust from my camera. Cleaning the exterior camera body was OK, but opening the camera, exposing and cleaning dust from the sensor was a scary operation for me. I made a lot of research and tries, ended up with my own method and tools. I will share with you in this article my cleaning process for my mirrorless Fujifilm Cameras.
Dry your camera if necessary. Then remove exterior dust from the camera body and lenses. Clean the camera LCD, viewfinder and the glass of the lenses. Check the camera sensor for dust, and only if dust is detected, clean the sensor with an air blower, an Eyelead Gel Stick, or a Rollei Swab.
I will get into details of my camera cleaning process in this post. You will find written explaination and also a video showing me cleaning my camera.
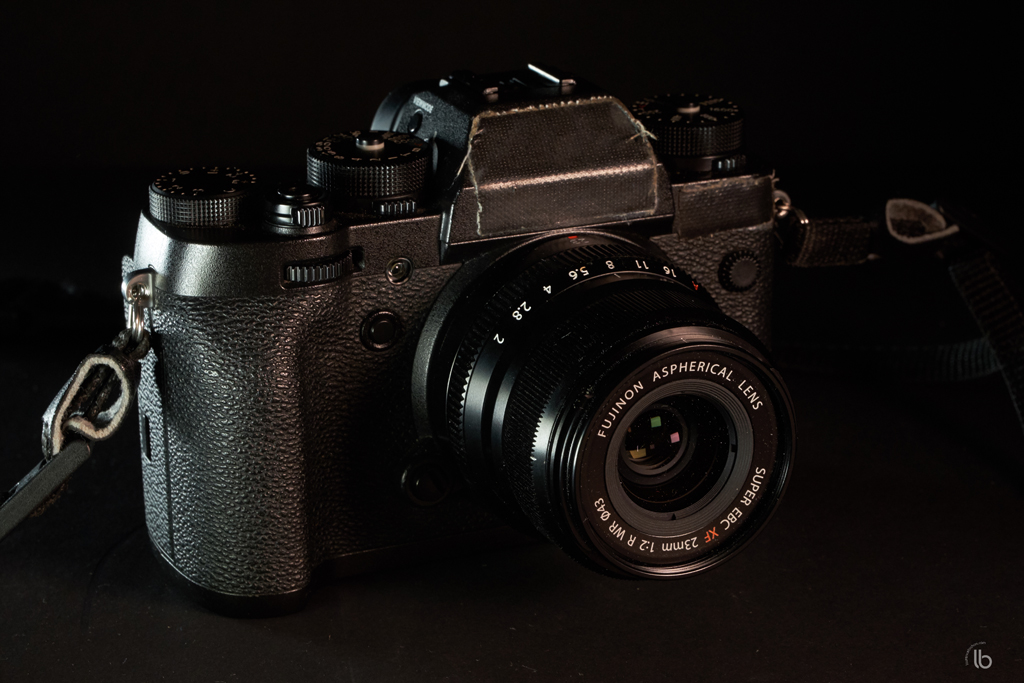
I’ve been shooting Fujifilm camera for several years now as a freelance photographer. I use X-T2 bodies as well as a X100F, and several Fujinon and Samyang lenses.
Please note that I am exposing my own process for cleaning my camera equipment. This article does not pretend to give general advices regarding camera cleaning, a topic that is often tagged by camera manufacturers as a risk of hardware damage.
I often take my Fujifilm with me outside for shooting landscape or streetphotography. Sometimes it’s windy, or raining. Sometimes I chase storm waves and am being washed with sea sprays (even my camera, although I protect it as much as I can, with a camera coat for instance).
I also usually stick with one lens for a whole shooting session, because this is my way of being immersed in the shooting itself, but sometimes, I just change a lens outside in a hurry.
So when I come back, my camera bodies and lenses are not covered with mud and splashes, because I am cautious. But still they are dusty and possibly salty.
Here are the cleaning aspects I will be dealing with in this article :
- 1 – Dry the Camera Body and Lenses
- 2 – Remove Dust on the Camera Body and Lenses
- 3 – Clean the EVF, LCD and Lenses
- 4 – Clean the Fujifilm X-Trans Sensor
- 5 – My Cleaning Kit Supplies
- 6 – Conclusion
Dry the Camera Body and Lenses
Let’s speak a little about Fuji specification regarding weather sealed cameras and lenses. In the Fuji X-T2 specifications, Fujifilm writes that the Fuji X-T2 is resistant to dust and moisture. This camera body is weather-sealed in 63 points. This is good, and far better than non weather-sealed camera.
However, I try not to get my X-T2 under pooring rain, because :
- Fuji mentions “moisture”, not water in the specification. When describing their tough camera FinePix XP130, Fuji says explicitely that it is waterproof to 65ft/20m.
- The mount ring does not seem waterproof. It’s just metal to metal. There is no specific rubber join. So for me, the mount ring is an open door to water inside the camera.
- I use several Fujinon lenses. An nowadays, my goto outdoor lens is the Fuji 55-200, which is not a weather-sealed lens.
For these reasons, I never had my camera under pouring rain without any protection. If unexpected rain comes, I protect my Fuji under my rainvest, or a plastic bag. Otherwise if rain was forecasted, I protect it with a camera raincoat. I spent hours with this rain gear shooting sports at a rugby field or shooting waves at the ocean.
Here is a link at amazon.fr for my camera raincoat.
When my camera and lenses are wet or damp when I get home, I keep them at the room temperature. I do not try to dry them on a radiator and with an hair dryer.
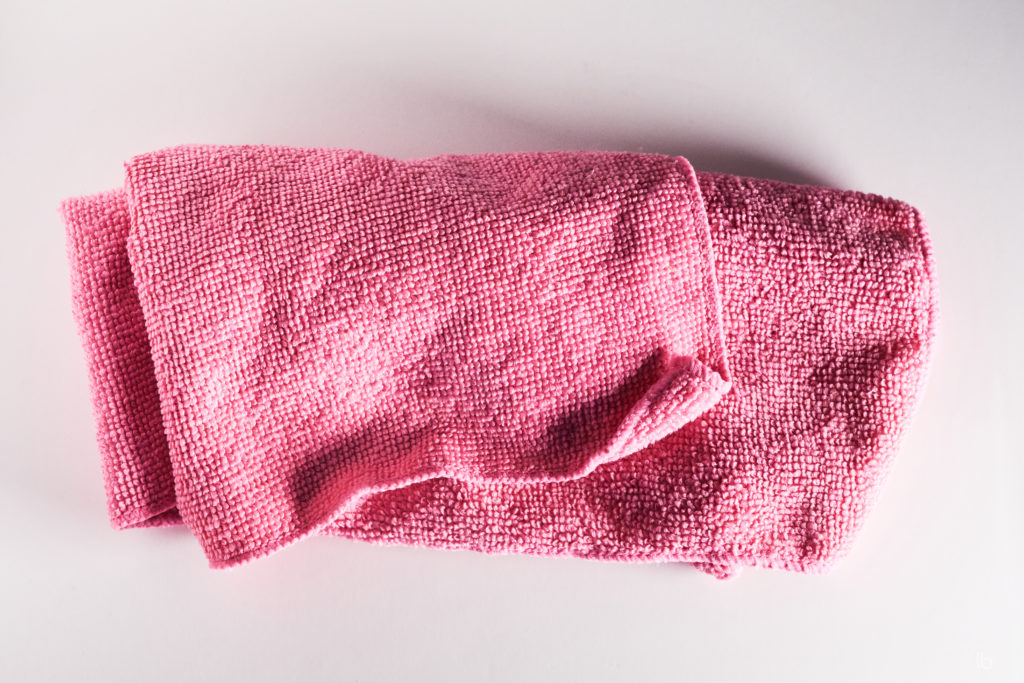
I then use a clean microfiber cloth and dab carefully the exterior of my camera and lens mounted.
I dry my camera and lenses in several steps :
- Dab carefully the body with the lens mounted with a microfiber cloth.
- Put the lens cap and hood to dry separately.
- If my camera has been sprayed with salted sea water, I clean it with a humid microfiber cloth. I take time to go several time on the body with the lens mounted. I even taste it to see if it is still salty. I do the same with the lens cap and hood.
- Unfold the zoom lens to its maximum length and dab it dry with the microfiber cloth.
- Detach the eyecup and set it to dry separatly.
- Set the flash hot shoe cover apart to dry.
- Put the battery out and keep the battery lid open.
- Put the SD card out and keep the memory card lid open.
- Unfold the LCD mechanism.
- Detach the camera and the lens, put the openings down on a clean surface.
- Wait until they dry.
So far, I had no special issues resulting from my camera being damp or a little wet. They’ve always been able to go out for another shooting after a few hours of resting time.
Remove Dust on the Camera Body and Lenses
I do not expect my camera to be as shiny as it was when it was brand new. However, I try to keep it clean, in order to prevent those dust or sand particles to get deaper in the camera knobs, dials or internal parts.
My Fuji camera, the X-T2 is resistant to dust, as specified by Fuji. 63 camera points have been reinforced against dust. That’s good to have.
However, sometimes, I had issues with my focus stick when shooting on the beach. I was not covered in sand or lying on the sand. Just shooting on the beach on a windy day. Several times, my focus stick began to crack in one direction, as if a sand grain had made his way inside. It happened several times, and disappeared everytime after a while without me doing anything.
My Fuji equipement gets quite a lot of shooting and gather dust, mostly in the unaccessible parts :
- where the ISO or SPEED dials are close to the body
- in the LCD mechanism
- under the eyecup
- on the lens – body metallic mount
- in the stripped zoom or focus rings of the lens
I usually clean dust this way :
- camera and lens attached :
- blow air
- clean platic and metallic parts with a slightly damp Q-tip
- lens unmounted :
- blow air inside the lens.
- clean the x-mount metallic parts and the lens connectors with a Q-tip slightly sprayed with a lens cleaner solution.
- carefully clean the body x-mount metallic parts and the lens connectors with a Q-tip slightly sprayed with a lens cleaner solution. I usually remove small metal parts here, created by the mount frictions when changing lenses.
I do not blow air or try to clean the camera sensor yet.
I prefer to check the sensor for dust. If I detect dust, then I will try to clean the sensor. If not, I prefer not to take the risk to blow dust in.
Clean the EVF, LCD and Lenses
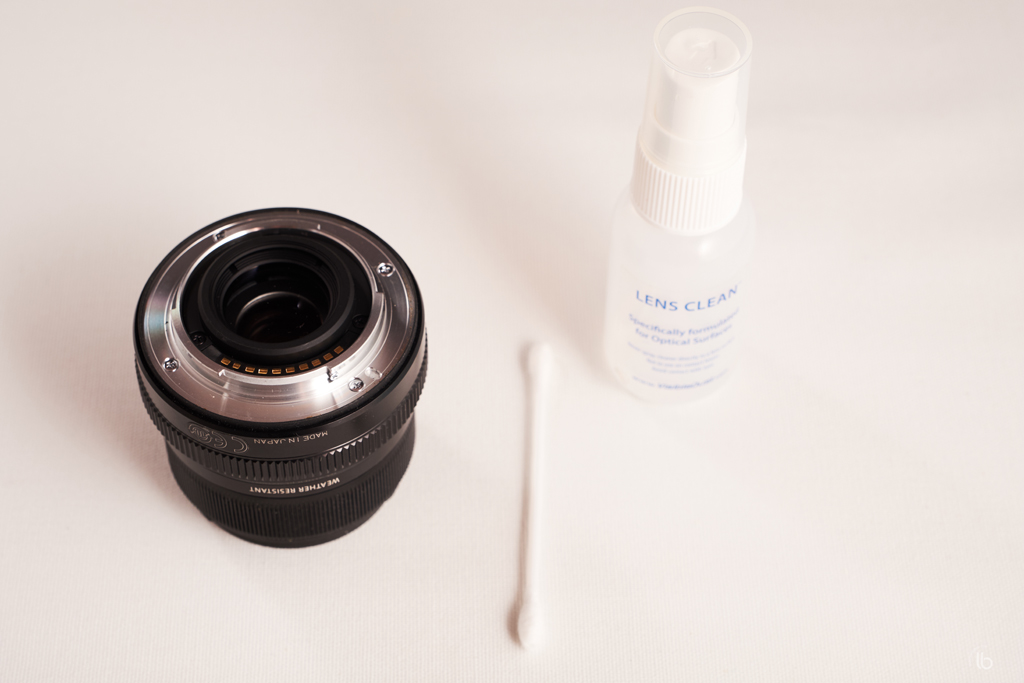
Only after having removing dust from the body and lenses, I clean the EVF, LCD and lenses. I use one Zeiss lens wipe.
So long, I only had to clean the exterior glass of my lenses. Before beginning, I blow the glass and check carefully for particles on the glass itself. If sand remained, I could scratch my lens when wipping it with the wipes.
I unfold the wipe, and apply it with a circular movement on all the surface of the glass. And pretty soon, the damp traces get away and the glass is clean.
Before the wipe dries out, I the clean the body EVF and LCD.
Clean the Fujifilm X-Trans Sensor
How to Check the Camera Sensor for Dust
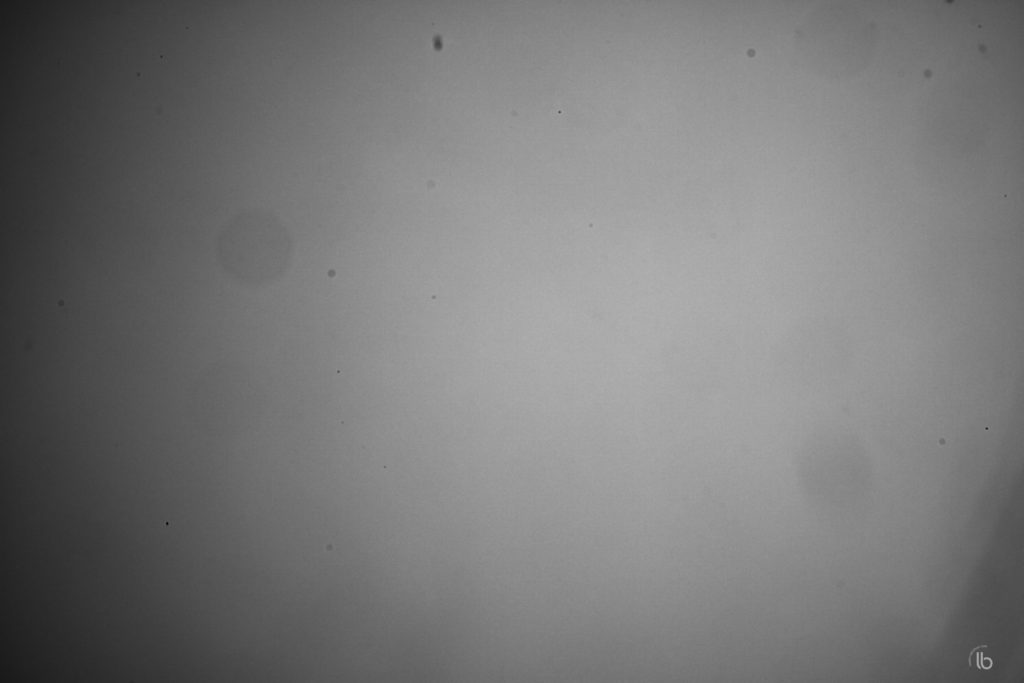
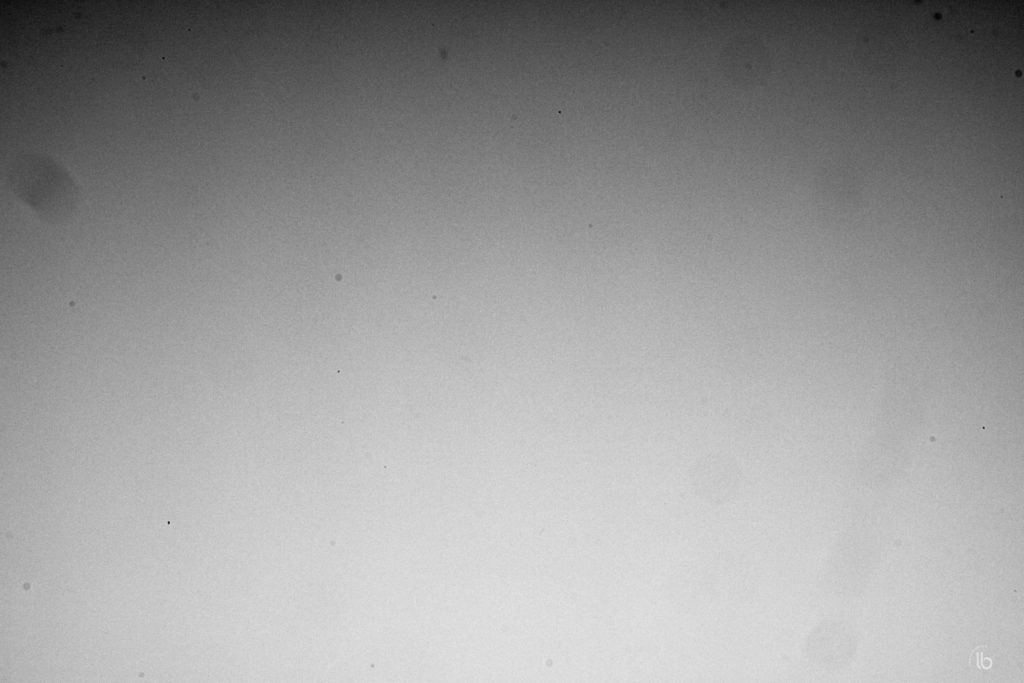
Sensor dust is mostly visible with a small aperture (eq f16, f22). This is why I test my camera sensor this way : I take a picture of a white surface while making a circular movement with my camera with the smallest aperture possible.
Why the circular movement ?
- this way, I do not misinterpret a spot on the white surface with dust on the sensor.
Why ISO 200 ?
- it order to increate the exposition time.
Here is how I check my sensor step-by-step :
- Camera settings:
- zoom at its longest focal length
- f/22
- ISO 200
- Speed auto
- Exposition compensation +2 (because we will photograph a white surface, otherwise the result will be dark, 18% grey)
- manual focus. Not special focus is required. It’s just to avoid the camera to block because unabled to focus.
- Aim the camera at an homogeneous white surface.
- Shoot while moving the camera with a circular movement towards the white surface.
- Check the resulting picture on a computer if possible, or sweep the picture with the zoom max if you do not have access to a computer.
You’ll often find a similar method with the sky. It’s OK, but requires you to check your camera during day time. With a white surface, you can test your sensor whenever you want.
If there is no significant dust on your sensor, I’m good to go and do not clean it.
On the other hand, if I see lot’s of spots or a rather big one, I start the sensor cleaning phase.
In my example here, you see my sensor was covered with spots when I checked it before any sensor cleaning.
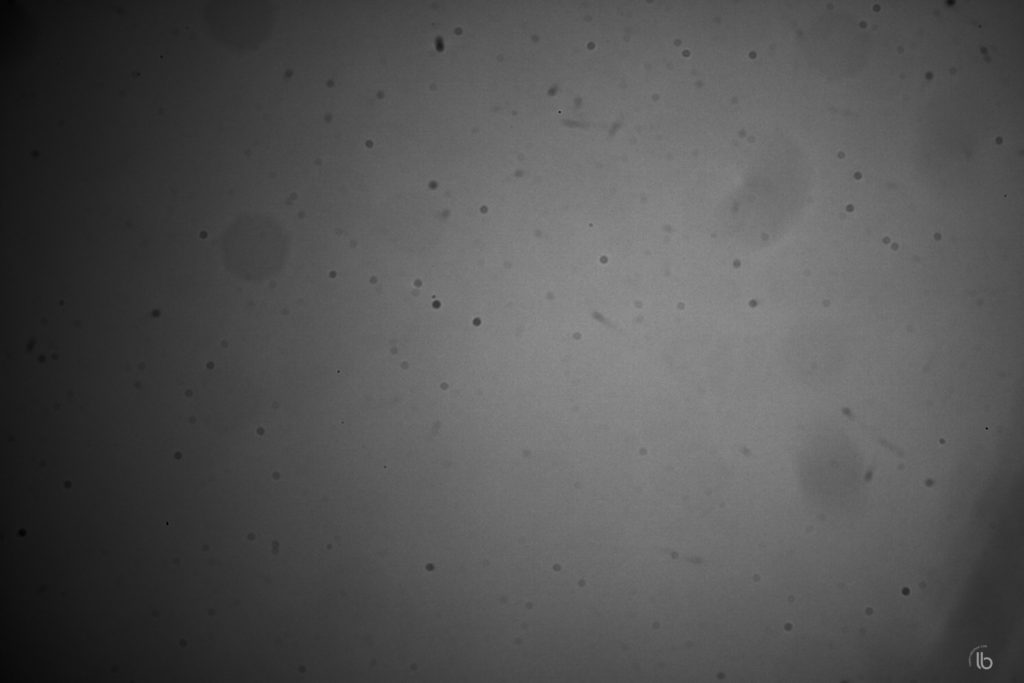
You can start by looking at the sensor surface with a loop and see whether you see a particle or a scratch. However, the “big” spots you see when checking the sensor are often invisible this way.
Sensor Cleaning and Camera Manufacturer Warning
What does Fujifilm say about camera cleaning ? Here are some excerpt of their technical note “Cleaning the Image Sensor” :
- Do not use a brush or blower brush to remove dust from the sensor. Failure to observe this precaution could damage the sensor.
- Note that there will be a charge to repair or replace the image sensor if it is damaged during cleaning.
Clean Working Environment
Before starting to clean the sensor, I clean my desk, close the window. Make my workspace as clean and still as possible.
I then have three possible steps I apply one after the other in order.
All are dry cleaning methods.
Sensor Cleaning Step 1 : in Camera
Fuji cameras can perform in-camera sensor cleaning : the camera triggers a sensor vibration which may displace dust and particles.
In the menu USER SETTINGS > SENSOR CLEANING, you may choose between 3 options :
- Remove dust from the camera image sensor. The sensor will be cleaned immediately.
- WHEN SWITCHED ON If this option is ON, sensor cleaning will be performed when the camera turns on.
- WHEN SWITCHED OFF If this option is ON, sensor cleaning will be performed when the camera turns off (sensor cleaning is not however performed if the camera turns off in playback mode).
Personnaly, I set WHEN SWITCHED OFF to ON.
Check these options with your camera. If neither WHEN SWITCHED ON, nor WHEN SWITCHED OFF are set to ON, run the sensor cleaning several times and check your camera sensor for dust again.
I then suggest to change these options and perform an in-camera sensor cleaning when your switch on and/or off the camera.
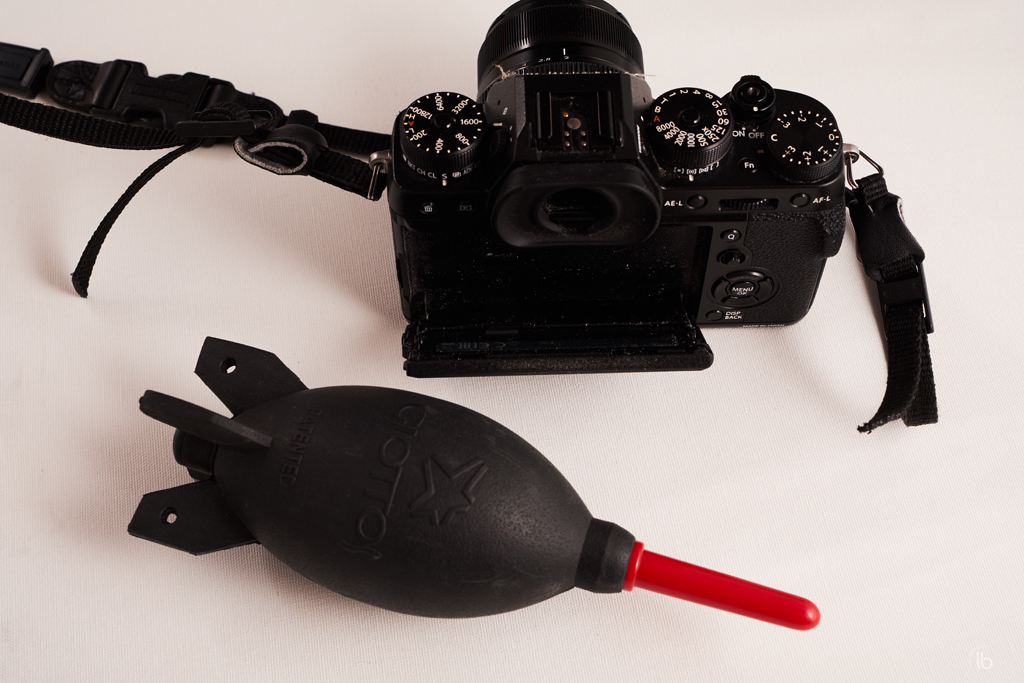
Sensor Cleaning Step 2 : the Air Blower
I use a Giotto Rocket air blower. This a quite a big manual air blower. There is a filter at the air entrance, so the blower will blow less ambiant dust than simpler blower.
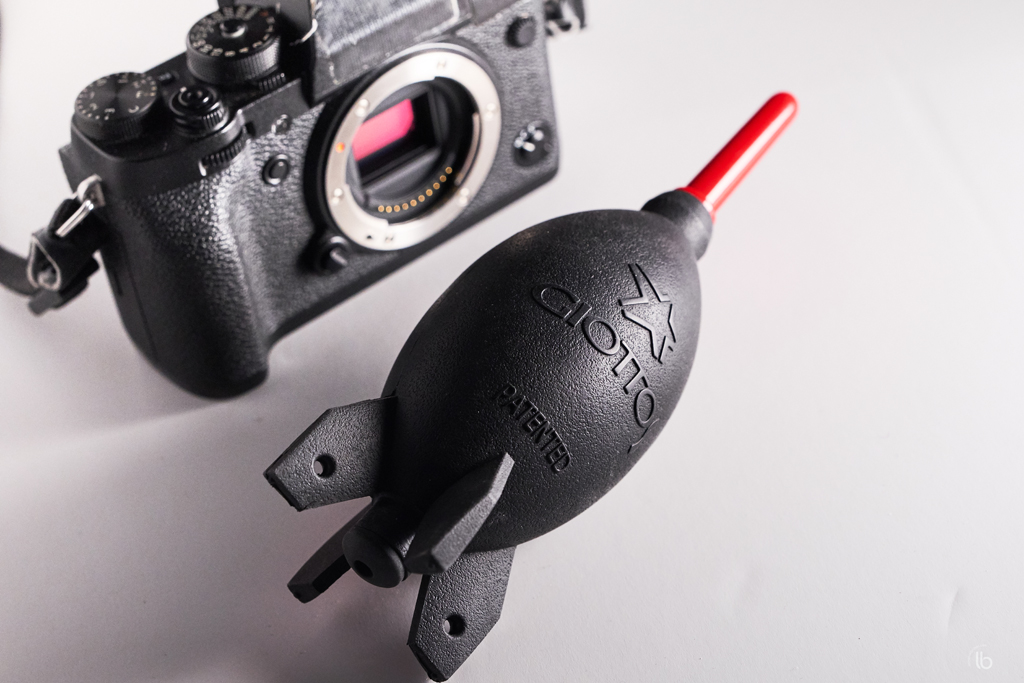
I maintain the camera body with the sensor towards the floor, blow upwards, and maintain a 5 cm distance between the blower and the camera sensor, in order to be sure not to touch inadvertently any part of the sensor with the blower.
Blowing air will dislodge dust settled on the sensor.
I already had to clean my camera sensor while camping. I noticed a big dust during landscape shooting during the day. I lived with it until the evening at the camp site, isolated myseld in the tent, and blowed air on the sensor. I was lucky, it worked.
In my example, blowing air removed some particles, but not enough as you can see below.
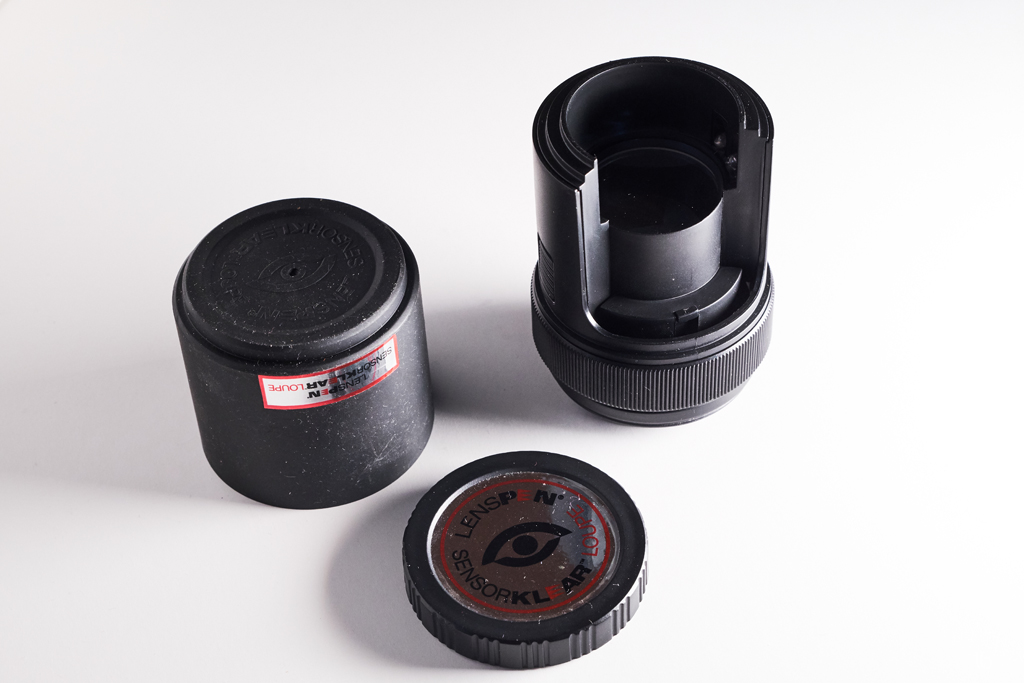
Sensor Cleaning Step 3 : the Gel Stick
I personnaly decided to use gel sticks on my Fujis when the air blower had no effect on removing big dusts on my sensor. I could also go to a Fuji certified maintenance center. I decided at my own risks to try and clean my cameras myself and so far everything went fine.
I use Eyelead gel sticks for my Fuji cameras.
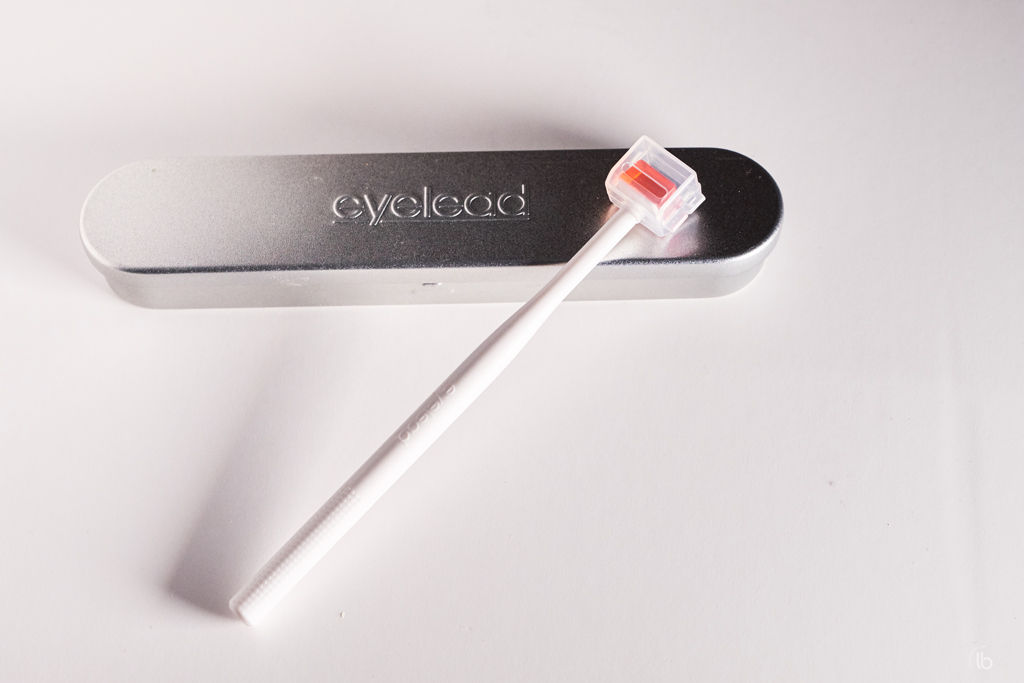
It consists on a sticky stick and a sticky paper.
This is a dry cleaning solution. You apply the sticky stick on the sensor, then clean the sticky stick on an the even more sticky paper.
Here is the website form Eyelead in Germany. It does not seem to be updated regularly.
The SCK-1B “red” version is less adhesive than the original SCK-1 “blue” sensor gel stick. I chose the red version.
A while after the initial German gel stick product was developped, copies appeared from others compagnies. However, I prefered to have the original one, because the stickiness is important : the stick has to be sticky, but not too much so that it could damage the UX filter on my sensor.
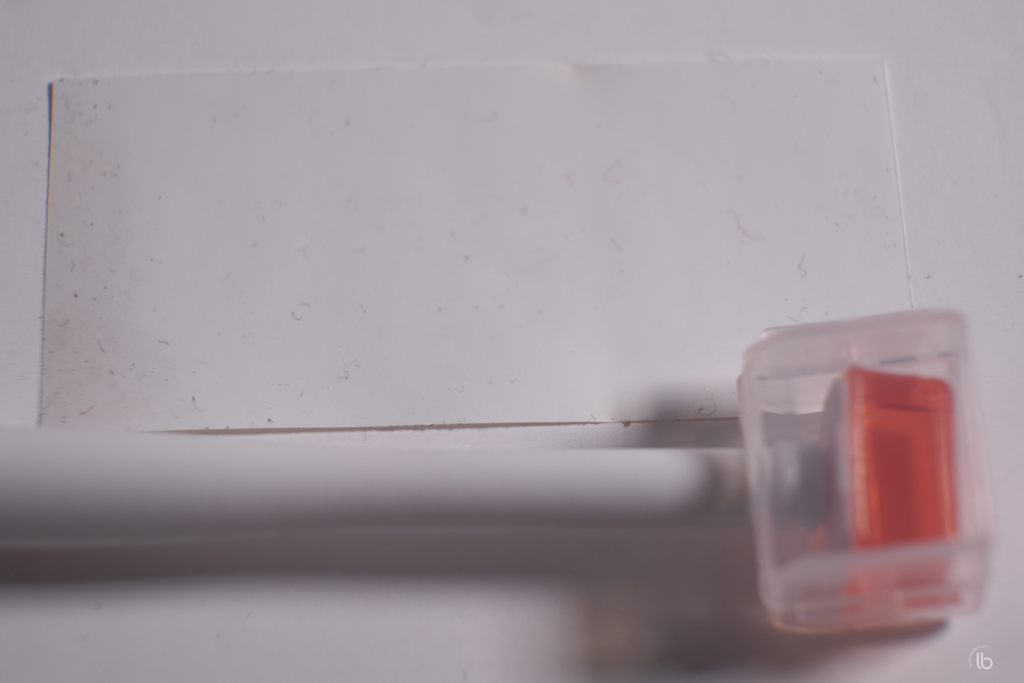
The principe is to apply with a little pressure the gel stick on the sensor. Then pull it lightly, it sucks a little bit the sensor. Dust goes from the sensor to the stick. After several moves on the sensor, clean the stick on the even more sticky paper. Dust goes from the stick to the paper.
I often do several clean-check cycles. Sometimes, the result is worse after the first pass, because the stick slightly touched around the sensor surface. It can displace tiny grease spots or dust from the border of the sensor. After another pass, it’s generally a lot better.
Regularily, I notice that my gel stick does not stick anymore. I just wash it with water, let it dry, then it performs well again.
If I still notice spots when testing the sensor in my example, especially the big bold spot on the center high par of the screen. This spot annoyed me a lot during my recent portrait shoots.
I start this last cleaning try before bringing my camera to a Fuji Cleaning Center.
Sensor Cleaning Step 4 : the Rollei Dry or Wet Swabs
I sometimes use in last ressort the Rollei swabs. These swabs come in dry. You can apply them dry on the sensor, or apply them wet with one drop of sensor cleaning fluid.
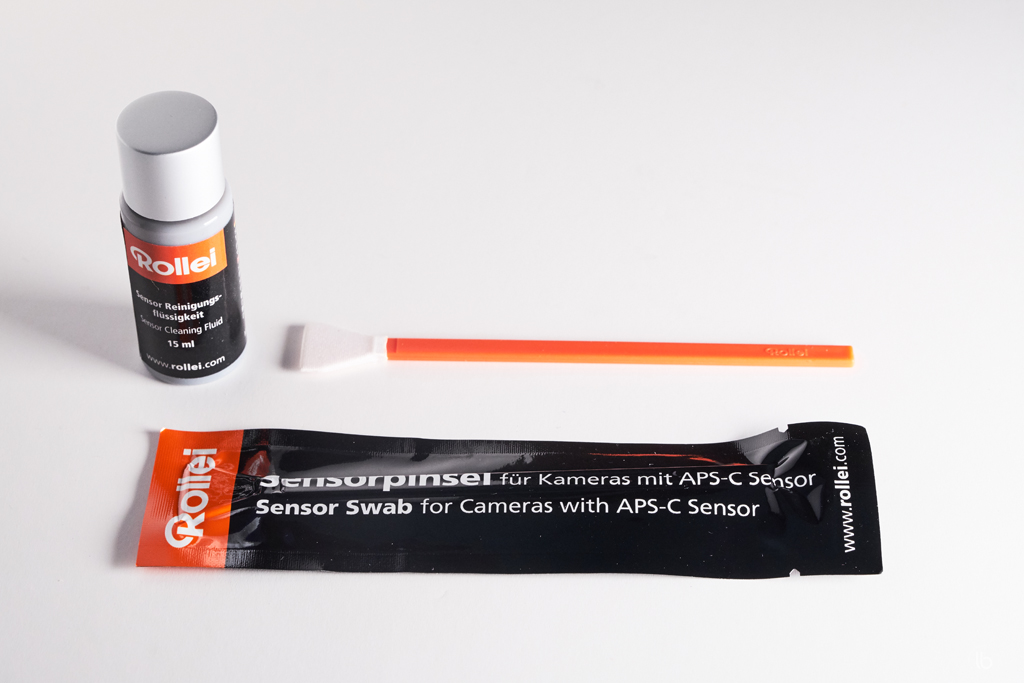
I apply them dry, one way in one direction, and return.
I could opt for wet cleaning with Rollei swabs and cleaning solution. I tested several times, but it did not remove the remaining spots for me. It rather spread out traces on the sensor I had to remove with another pass of Eyelead sticky gel stick.
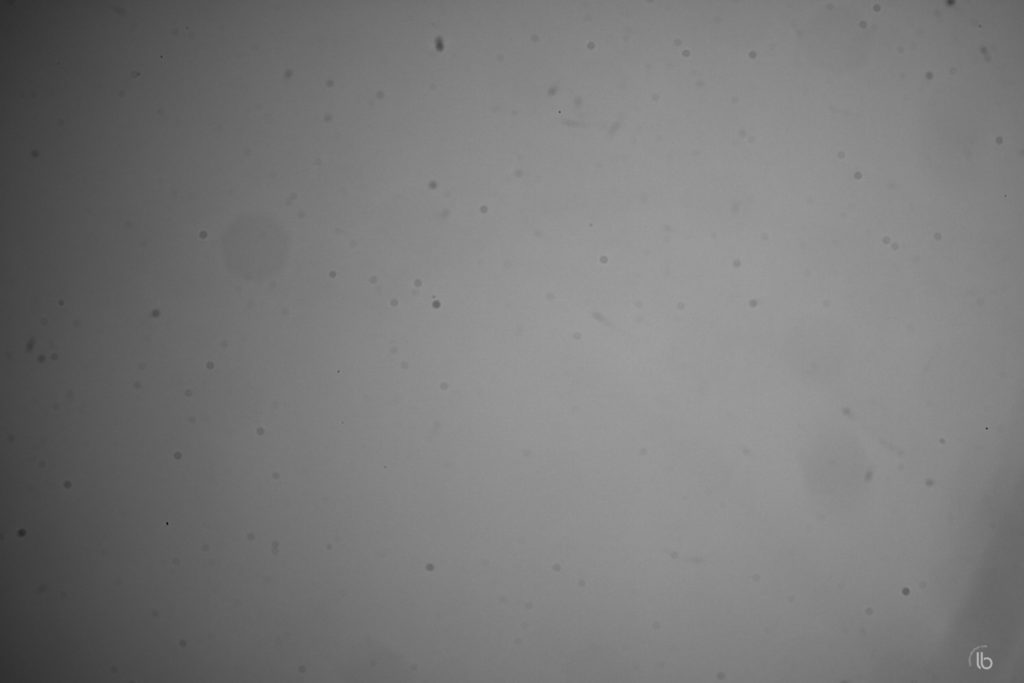
Here is the sensor test result after cleaning with a dry Rollei swab.
The result is not perfect and will never be. But the bold upper spot is attenuated, and in real situation, it’s OK, as you can see with a Parisian sky below.

At this stage, I am happy with my sensor cleaning.
Fuji Certified Reparation Center
That’s how far anyway I get with sensor cleaning.
Sometimes, some spots still appear when I check the sensor.
These remaining spot could be due to :
- particles still laying on the sensor, like kind of glued to it.
- particles inside the sensor. In fact, what we call the sensor is an assembly between the UV/IR blocking filter and the actual sensor. What we see through the lens mount is the UV/IR filter. There is a thin air gap between the two where particles can get in.
- a sensor damage.
So far, remaining spots have always been somewhat present, however manageable.
Most of the time, I do not see the remaining spots on my pictures at all, because they mingle with details of the photo.
When I see big dust spots on my pictures, I retouch them in post-production. First, I try with Capture One. If I need a more advanced tool, I edit the picture with Photoshop.
If I get a very annoying spot at this step in the future however, I would get my Fuji camera to a certified Fujifilm Service Center for a more advanced cleaning.
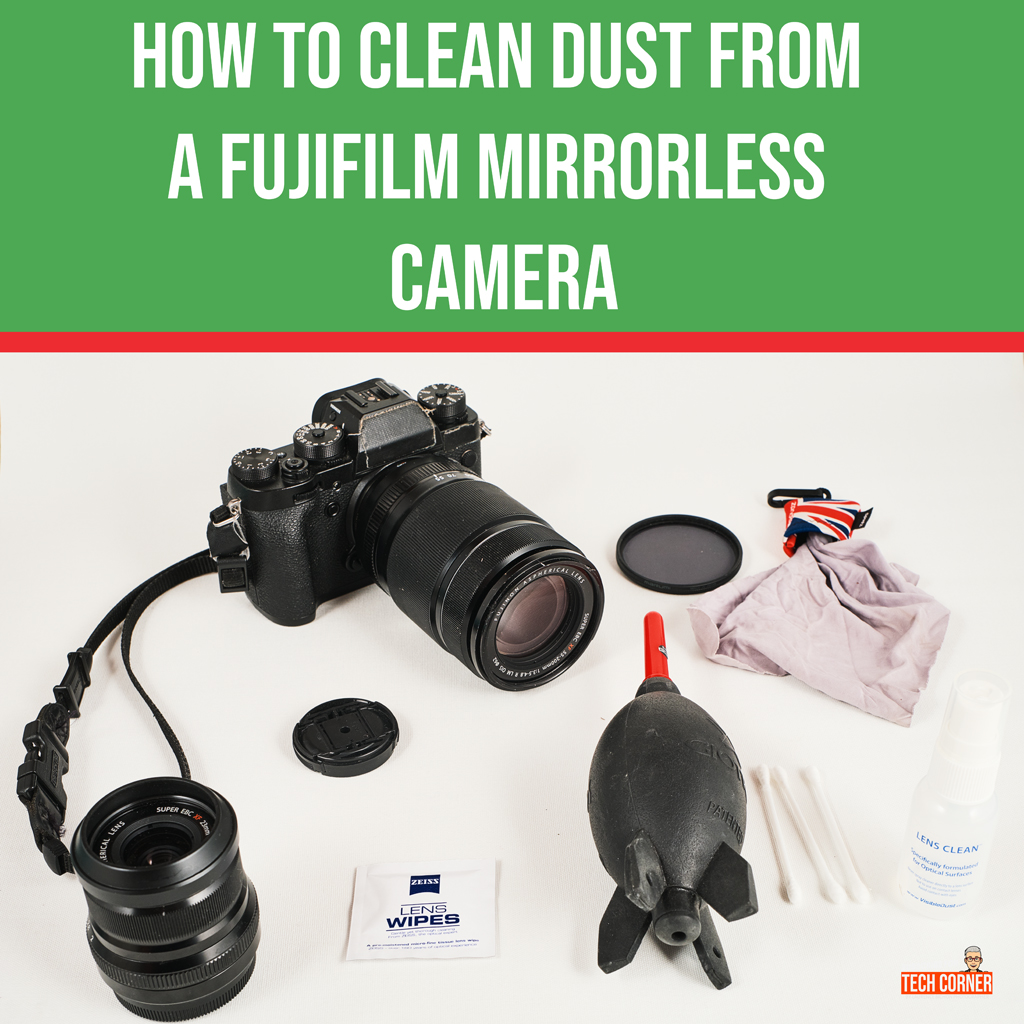
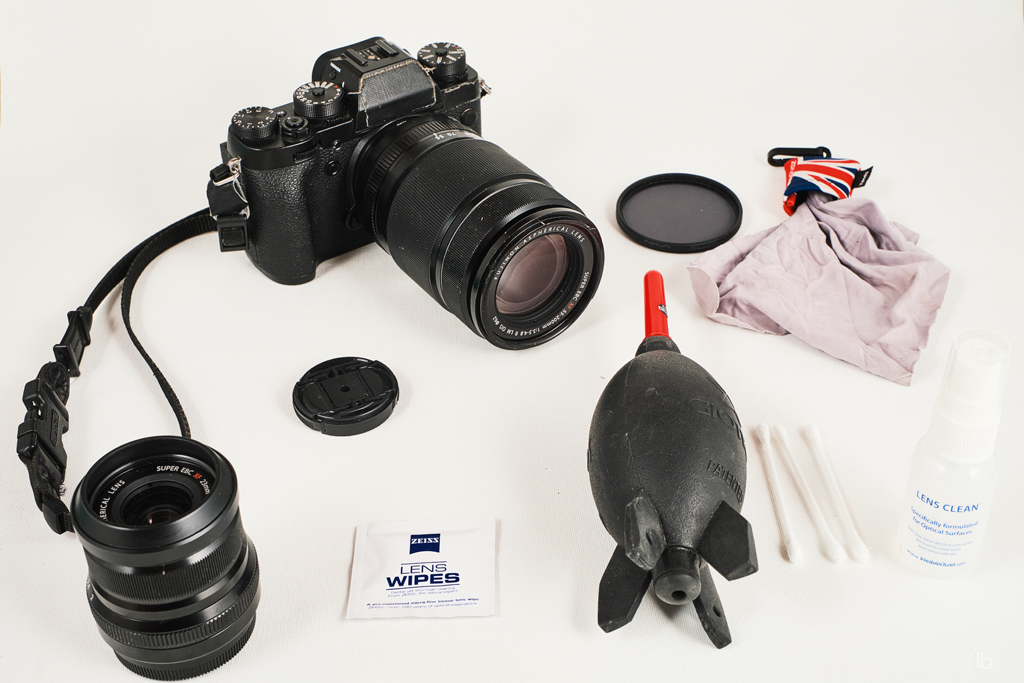
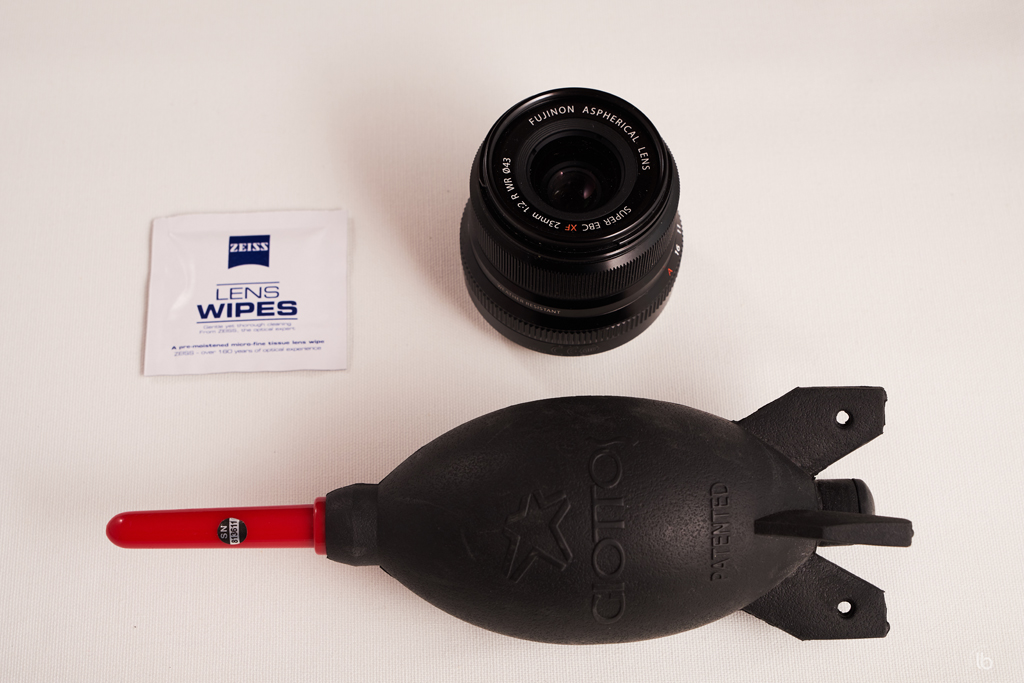
My Cleaning Kit Supplies
Here is a list of the tools I have in my cleaning kit supplies :
Microfiber cloth
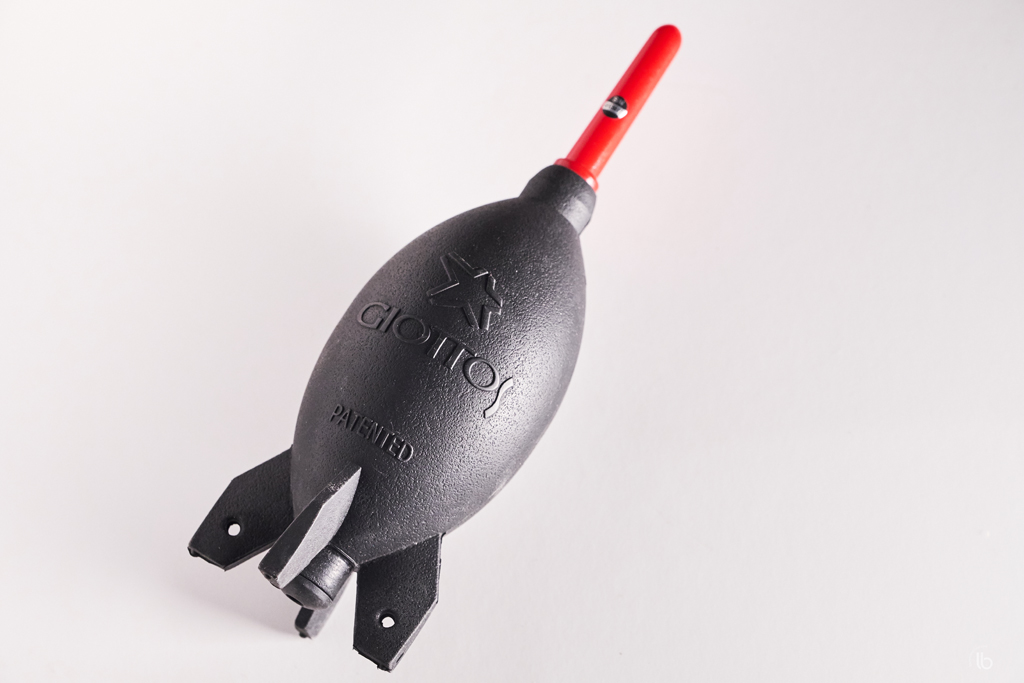
Giottos AA1900 Rocket Air Blaster.
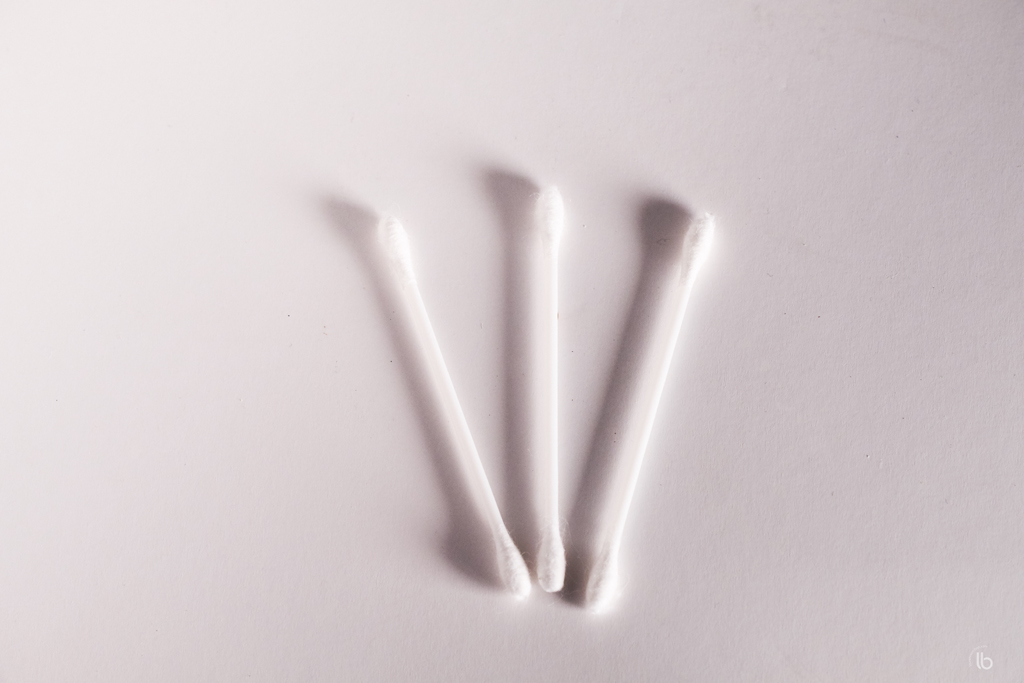
Q-tip
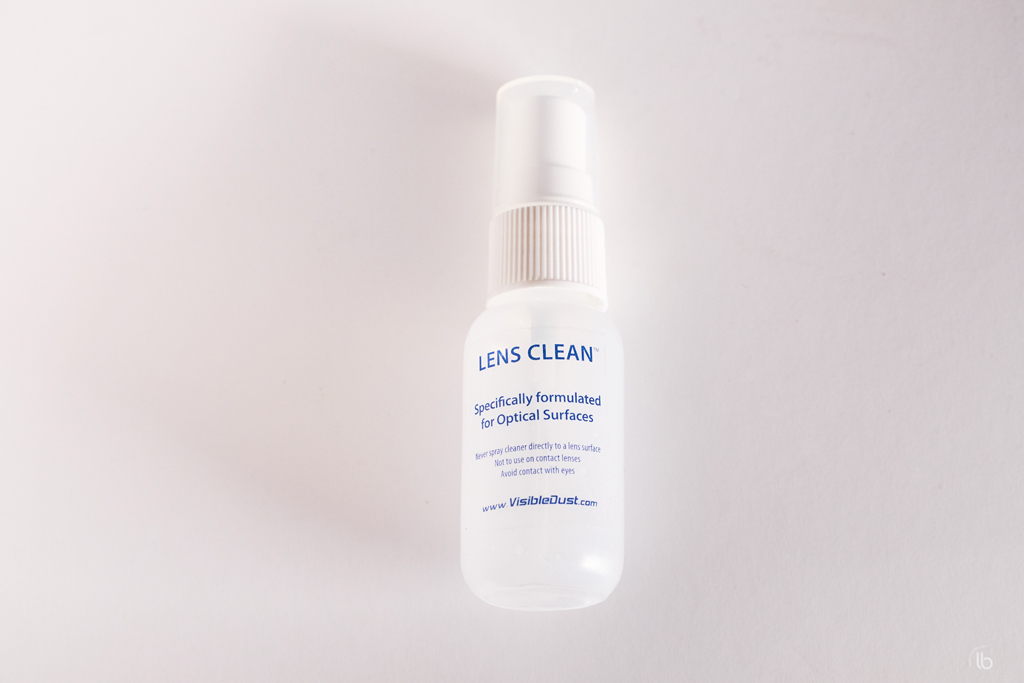
Lens Clean solution
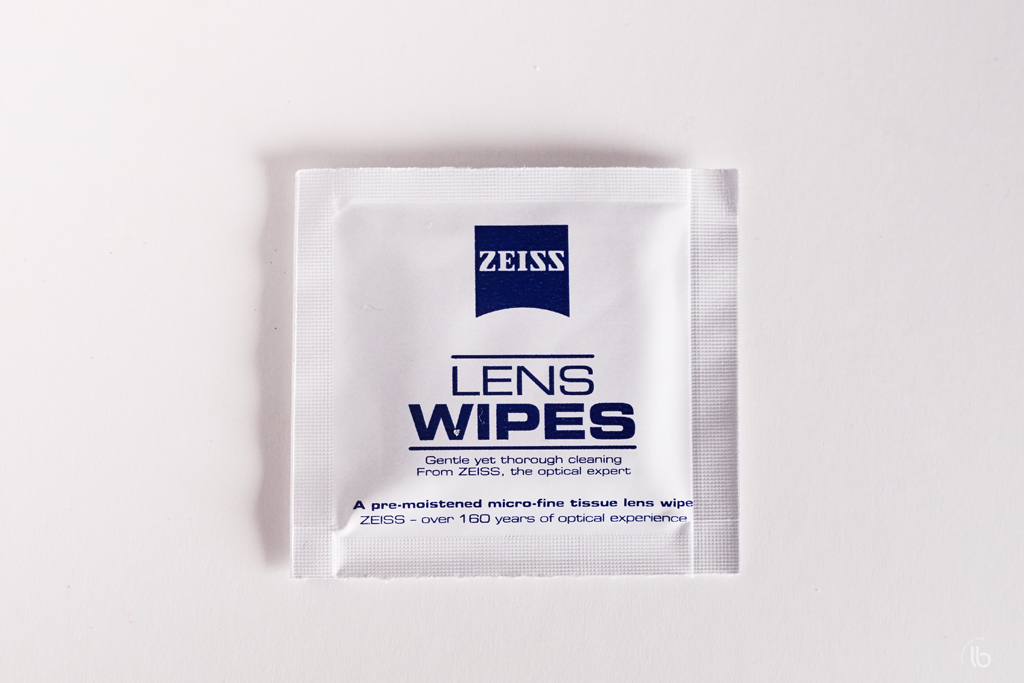
Zeiss Pre-Moistened Lens Wipes.
These wipes are really great because they do not leave traces on the glass when drying. You may find Zeiss Pre-Moistened Lens Wipes here at amazon.com.
Eyelead Gel Stick.
You may find Eyelead Sensor Gel Sticks here at photographylife.com.
Rollei Swabs.
Conclusion
Thank you for your visit !
Now, it’s time to get back to the field…